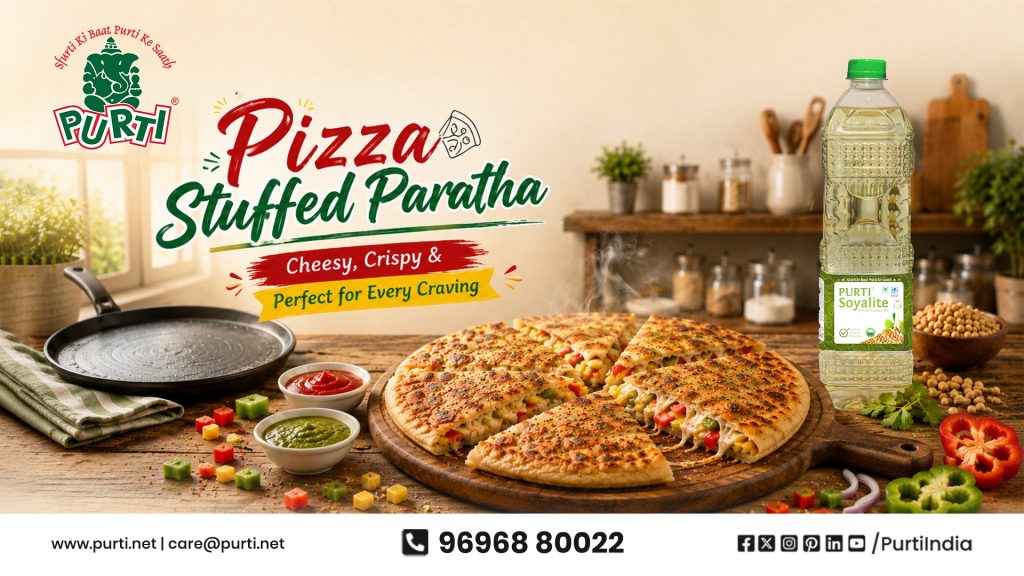
There are days when everyone at home craves pizza, but the kitchen calls for something quicker, fresher, and more filling. That’s when pizza stuffed paratha becomes the perfect answer.
Picture a hot, golden paratha coming straight off the tawa, filled with gooey cheese, crunchy capsicum, juicy tomatoes, and fragrant herbs. It brings together the familiar comfort of homemade Indian food and the fun flavours of pizza in every bite.
Whether it’s a lazy Sunday breakfast, an after-school snack, or a quick dinner after a busy day, this recipe fits effortlessly into everyday life. The best part is that you don’t need an oven or special equipment just a few pantry staples and a little creativity.
A light coating of Purti Soyalite Refined Soyabean Oil helps give the paratha a crisp, golden finish while allowing the flavours of the cheese and vegetables to shine through.
In a large bowl, combine the whole wheat flour and salt. Add one tablespoon of oil and mix well.
Slowly add water and knead until you get a soft and smooth dough. Cover it and let it rest for about 15–20 minutes.
In another bowl, combine the grated cheese, onions, capsicum, tomatoes, sweet corn, and olives.
Add the pizza sauce, oregano, chilli flakes, and a pinch of salt. Mix everything thoroughly.
Divide the dough into equal portions.
Roll one portion into a small circle and place two to three tablespoons of filling in the centre.
Bring the edges together, seal the dough, and gently flatten it.
Dust with flour and carefully roll it into a medium-sized paratha.
Heat a tawa over medium heat.
Place the paratha on the hot tawa and cook for about one minute on each side.
Apply a little Purti Soyalite Refined Soyabean Oil on both sides and continue cooking until the paratha turns crisp and golden brown.
Repeat the process for the remaining dough portions.
Slice the paratha into wedges and sprinkle some oregano and chilli flakes on top.
Serve hot with tomato ketchup, mint chutney, or your favourite dip.
Here are a few serving ideas:
Whether served as breakfast, an evening snack, or a weekend treat, pizza stuffed paratha fits almost every occasion.
Yes. You can use processed cheese, cheddar, or any cheese available at home.
Absolutely. Allow it to cool for a few minutes before packing to maintain its texture.
Yes, you can prepare the filling a few hours ahead and refrigerate it until needed.
Purti Soyalite Refined Soyabean Oil can be used for roasting parathas, as its neutral flavour complements the cheese and vegetables.
Our commitment to quality is supported by the state-of-art infrastructure, its relationship with the buyers and modern production facilities.
Our Company pursues a single goal - completely focussed on th quality of the product.
© copyright, Purti Vanaspati Pvt. Ltd. All Rights Reserved.